
Your first teaching session
This walkthrough connects the tasks you do at the start of a teaching day: find your class, take attendance and enter an assessment. Allow about 15 minutes once your school account is ready.
Before you start
Have your teacher account, an assigned class and subject, and the correct academic term. Your school administrator sets those up. To explore without changing school records, open the teacher demo. The screenshots below are demo views, not proof of submitted school records.
1. Check your assignments
Sign in to your school's teacher portal using the email your administrator invited. The dashboard lists the classes and subjects assigned to you.
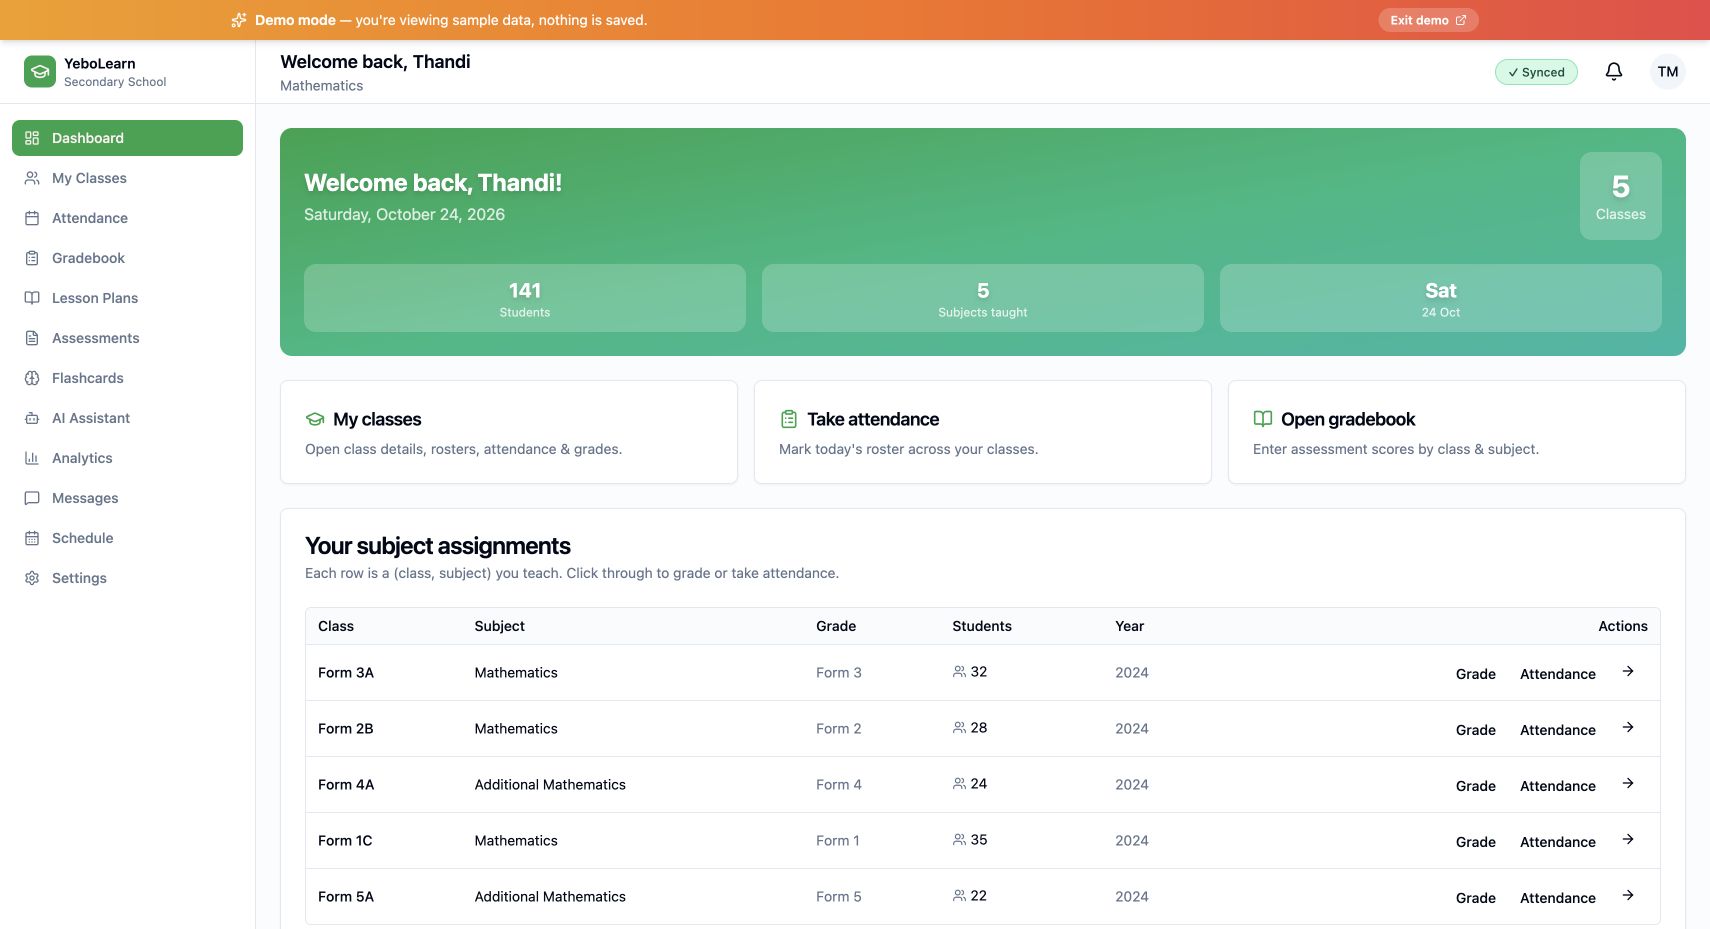
Actual YeboLearn interface, captured in the public demo on 24 October 2026. Names, marks and balances are sample data. Select the image to view full size.
Find the row for the class and subject you are teaching. Use its Grade or Attendance action, or open the matching sidebar section. If the class is missing, ask your administrator to check the class-subject assignment. Do not pick a similar class just to get past the screen.
Ready to continue: the class, subject and student count match your timetable.
2. Take today's attendance
Open Attendance and select the class. The heading Mark Attendance shows the day you are recording.
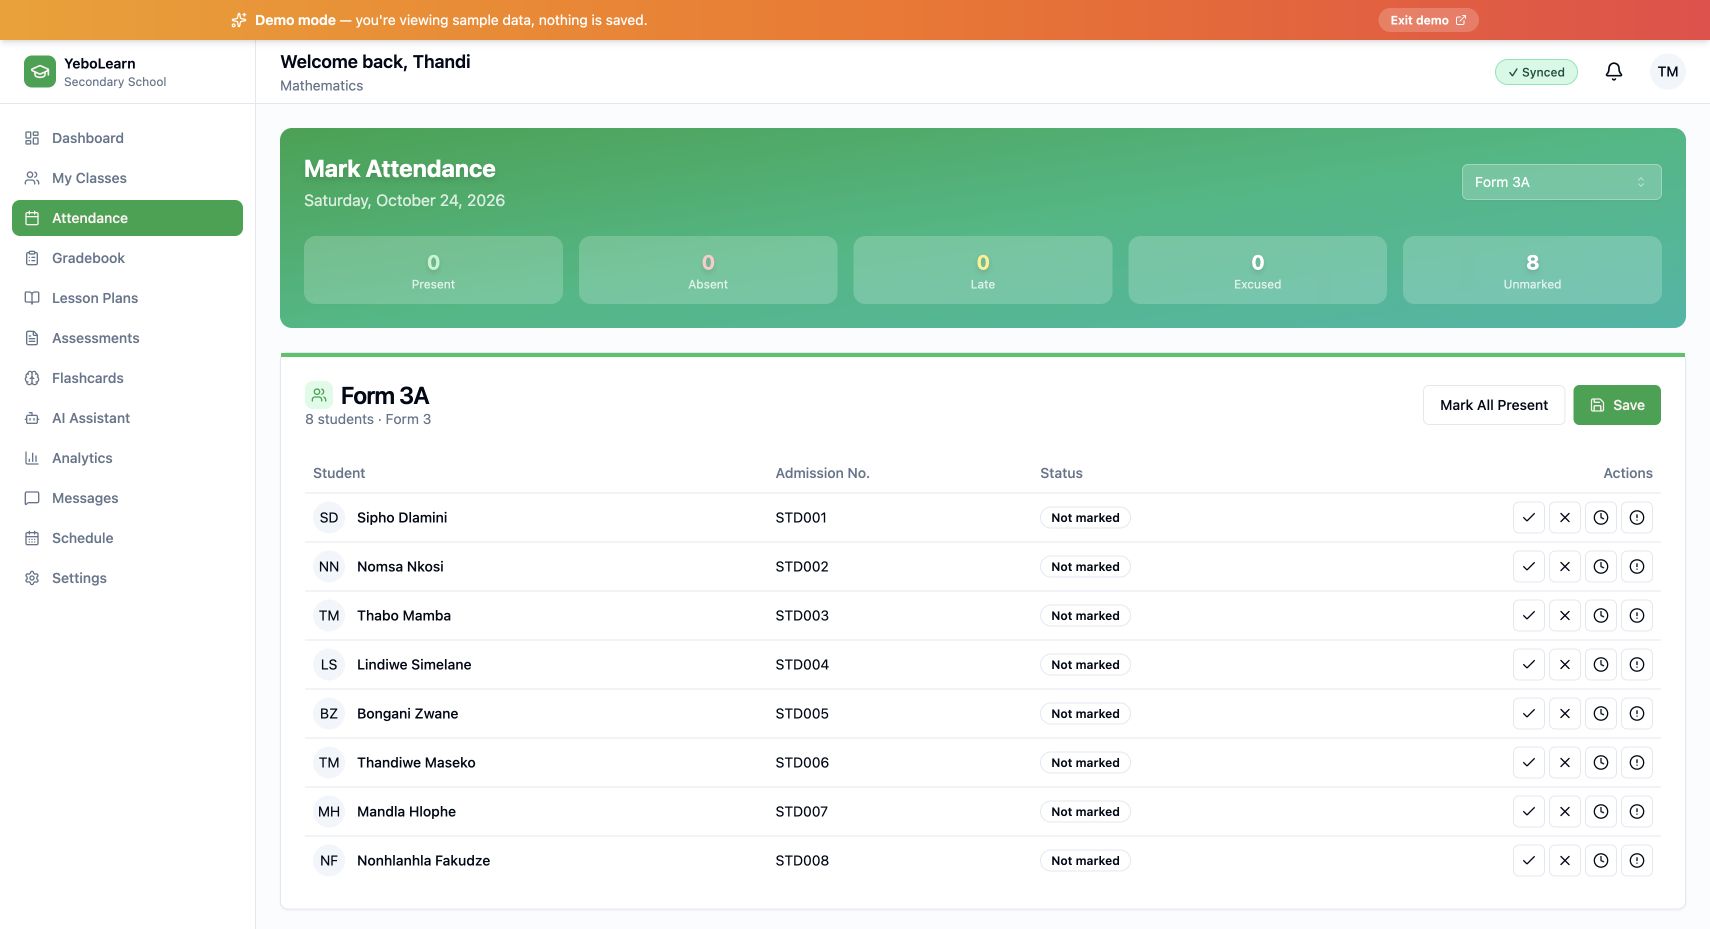
Actual YeboLearn interface, captured in the public demo on 24 October 2026. Names, marks and balances are sample data. Select the image to view full size.
- Check today's date and the selected class.
- Work through the roster. Use the tick for Present, cross for Absent, clock for Late or exclamation mark for Excused.
- For a mostly present class, select Mark All Present, then correct the exceptions.
- Check the Unmarked count. Unmarked students are skipped when saving.
- Select Save and wait for confirmation.
Attendance requires a connection and saves directly to the server. A failed save is not an offline queue. Keep the screen open, restore the connection and retry after reading the error. A second save for a student on the same day updates that day's record.
The demo roster may be empty for a sample class. This illustrates the controls but cannot demonstrate a saved roll-call. In your school account, an empty roster needs an enrolment check. The Attendance guide covers history and corrections.
3. Prepare the assessment before entering marks
Open Gradebook, choose the class and subject, then select Enter Grades.
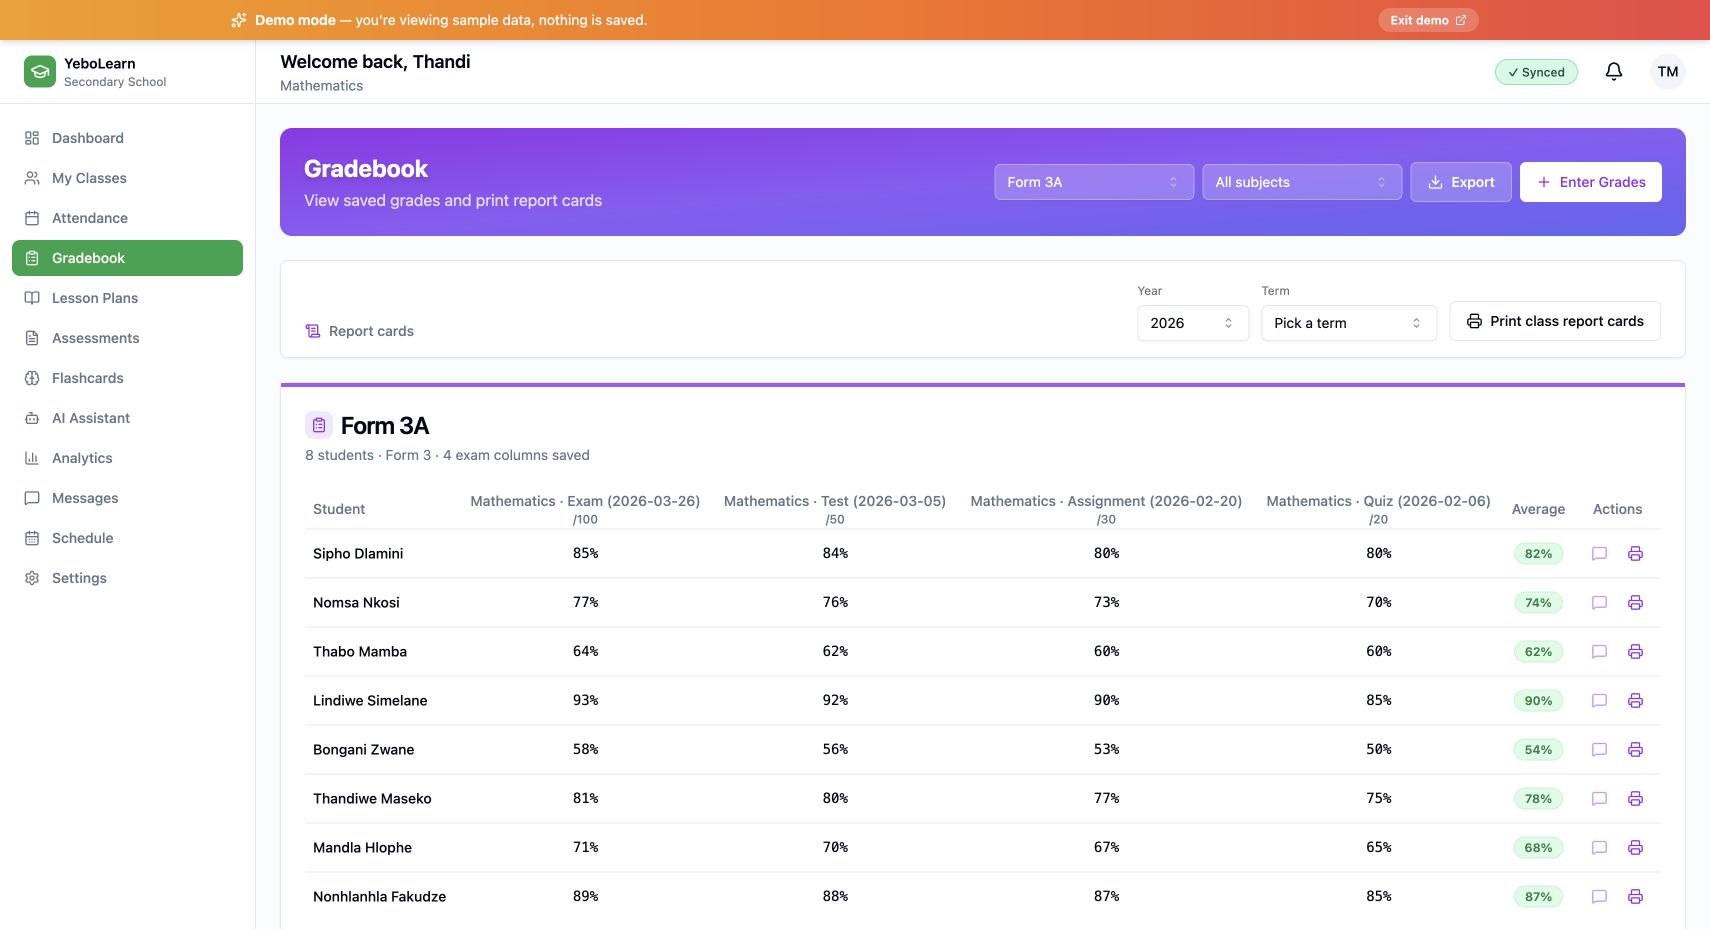
Actual YeboLearn interface, captured in the public demo on 24 October 2026. Names, marks and balances are sample data. Select the image to view full size.
On the mark-entry screen, use Change in the settings bar to check:
| Setting | Why it matters |
|---|---|
| Academic year and Term | Determines which report card includes these marks. |
| Assessment type and Date | Identifies the work being recorded. |
| Maximum score | A score of 18 out of 20 differs from 18 out of 100. |
| Exam name | Helps distinguish assessments of the same type. |
If the term control says No terms configured or No terms — ask admin, stop and ask the school administrator to configure it. The sample screenshot deliberately shows that state; it does not represent a completed assessment setup.
4. Save marks and confirm sync
Enter each raw score, inspect the calculated percentage, then select Save Grades. Keep missing work separate from a genuine score of zero. Check your school's policy for absent learners before recording a mark.
Marks and remarks use an offline outbox. A local save and a server-confirmed save are different states: wait for the sync chip to read Synced before treating the server copy as current. If the session expires, sign in again on the same device so queued work can finish. Do not clear browser storage while unsynced marks remain.
Return to Gradebook and check the saved assessment column. The Gradebook guide explains editing, offline messages and the exact save states.
5. Prepare the report card
Choose the same academic year and term in Gradebook's Report cards panel. Review marks and remarks before printing. School administrators control release to parents and students; entering marks alone does not publish a card.
Follow the Report Cards guide for the complete term-to-PDF workflow.
If you get stuck
| Problem | Next action |
|---|---|
| No assigned classes | Ask the school administrator to assign your class and subject. |
| Wrong or missing roster | Check the class, then ask admin to review enrolment. |
| Attendance save fails offline | Restore connectivity and save again; attendance is not queued. |
| Marks are still syncing | Keep the device open; inspect the sync chip and any validation message. |
| Sign in again | Re-authenticate on the same device; do not re-enter queued marks as duplicates. |
| Report card has no marks | Confirm that the assessment and report card use the same year and term. |
Continue with Classes, Lesson Plans and Messages.